Task 1 (Project 5): Test cut linoprints
I made a few impressions from my test cuts in black and purple. I used a student set of linocutting tools with 5 different blades, plus some unconventional tools like scissors and a screw, and varied the marks by changing how I applied the tools. The details are described in the associated Project 5 Blog post http://ocaprintmaking1.blueconcretemoon.com/?p=718


The results of my test cuts are not extremely exciting, but I think I learned quite a lot from this exercise because I chose a systematic approach which permitted to compare the basic effects of each tool.
Task 2 (Project 6)
I made an edition of 10 of my first linocut for this course and the quality came out fairly even after the initial prints, I guess this is because I used a press. The amount of ink on the brayer is important – too much seems to clutter the details. Not enough and the print becomes faint or spotty. It’s a matter of practice to get that right.
For the blog I’m including one of the first (weaker) prints and one of the later which are better. It is quite representive of the others. Slight variations aren’t visible in the electronic images. Preparatory work, details of the process and my reflections are described in the blog, http://ocaprintmaking1.blueconcretemoon.com/?p=738
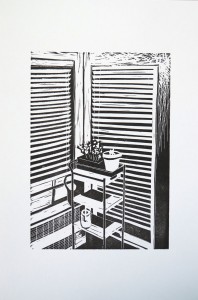

After the first linocut of the interior view I developed a second linocut, a still life. While working on it I thought it would benefit from a second colour, so I went ahead to make a second linoplate to print the background desk in a warm brown colour. The development of the print is described here http://ocaprintmaking1.blueconcretemoon.com/?p=775


Task 3 (Project 7)
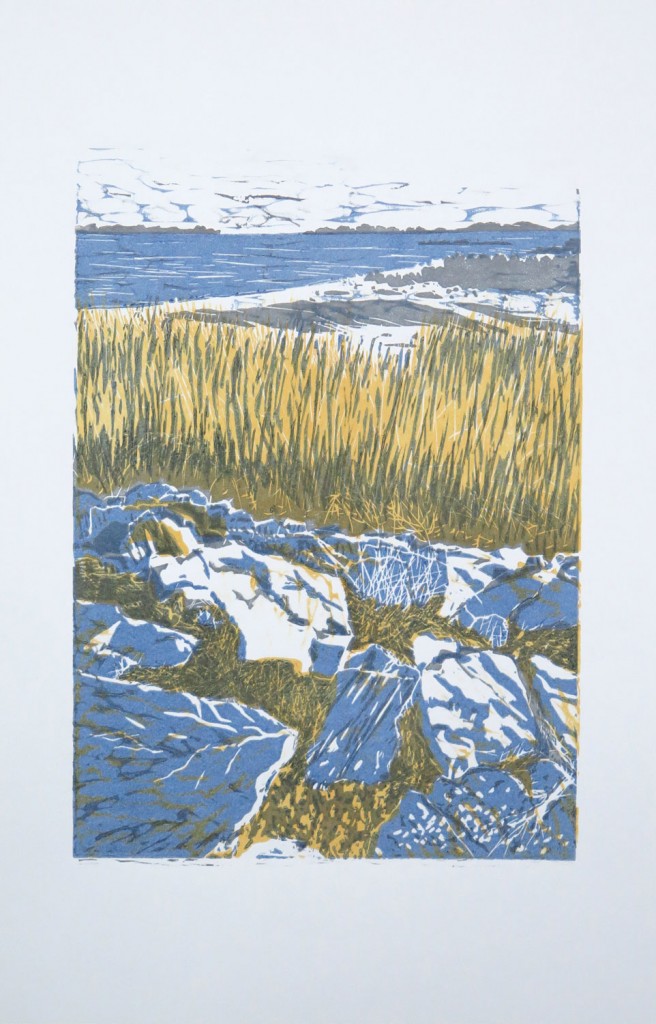
This project was a huge learning process. It was no linear progression but characterized by lots of trial and error with different inks and paper types, and in the end my attempts at improving the alignment of the elements on the plates resulted in erroneous cuts in each colour. As a result, I have some example prints from each series of attempts, but not an edition of quality prints.
Also, the seascape view I chose was a difficult subject. After finishing, I thought about trying out a different approach to the subject, building on what I had seen during my research on other printmakers, but I seemed to be confined within my own limits of perception and ability, and felt very stuck. I’m not sure what to make out of it. Maybe for now it’s better to proceed with the course and try something different to get going again.
OCA students are constantly encouraged to “push their limits” and I felt this might have been a situation where I needed to do just that. But when I tried, I did not know how to do it, as described here http://ocaprintmaking1.blueconcretemoon.com/?p=950. I felt I was just repeating myself or trying half-hearted variation. Working from a photo may have been a factor because the singular viewpoint and constant nature of the image tended to create boredom after a while.
Despite not being 100% happy with the outcome, I still feel that the project was hugely beneficial. I felt that I made most of the possible errors that are possible when working with multiple plates. So hopefully I’m now well prepared for more multiblock monoprints.
For the assignment, I’m including one print from each experimental series, plus those from the last series which are closest to the visual effect I wanted to achieve, despite some problems with alignment. The project with supporting work is described here http://ocaprintmaking1.blueconcretemoon.com/?p=783
1) Schmincke Inks
2) Speedball inks
3) Akua inks before corrections were made on the plates


4) Akua inks after corrections (single colour prints and final three-colour print)


Sketchbook work
During work on part 2, all my sketchbook work was directly related to the printing projects. Unfortunately as the cold winter weather came up, I abandoned my habit of taking the sketchbook out with me on my lunch break to draw a bit. With my busy schedule, I did not manage to develop a substitute habit. I regret this and hope I’ll get back to regular sketchbook work in part 3.
Checking my work against the assessment criteria
• Demonstration of Technical and Visual Skills – materials, techniques, observational skills,
visual awareness, design and compositional skills
I’ve been making linocuts earlier in my life so I was acquainted with the basic technique of relief printing and cutting the lino. Nevertheless I learnt loads in this project, in particular the systematic approach to multiblock printing, and many technical tips and tricks. I think the technical part worked quite well overall. Aspects to improve are the cleanliness of my cutting, for example obtaining clean shapes without accidental double contours.
I’d also like to improve my cutting of larger areas that are not supposed to be printed. Initially I liked the pattern from my tools which printed in these areas, but as they are similar in each consecutive subject and appear unwanted, I’d rather find a way of eliminating them or integrating them better into the composition.
I feel that my visual awareness is improving, both from looking closely at my own work but also from studying artist prints. What could be improved is how this translates into my drawings and sketchbook work and later into the final prints.
• Quality of Outcome – content, application of knowledge, presentation of work in a coherent
manner, discernment, conceptualisation of thoughts, communication of ideas
Actually I’m quite happy with the quality of outcome and feel that I’m able to apply knowledge gained from studying the course materials. I do make errors but I reflect on them and try to improve the issue in subsequent work. Registration of prints overall works well and I also manage to produce prints with clean paper borders. I’m beginning to feel more confident about expressing thoughts and ideas on the blog.
• Demonstration of Creativity – imagination, experimentation, invention, development of a
personal voice
I feel that I’m making progress in developing a personal voice or style in my prints, but I think the creativity and experimentation aspect was underdeveloped in this part of the course. It may have to do with the relatively narrow boundaries of the projects which did not prompt further experimentation.
• Context – reflection, research, critical thinking (learning log)
In my research and reflective thinking I’m trying to take on board tutor feedback that it’s important to find the relationship between other artists works and what I’m doing. It’s not easy though. I feel like these two activities, researching and practice, are conducted with a different mindset. When I’m researching, I’m a bit like a sponge and would like to take in everything irrespective of the immediate usability for a particular project.
By contrast, when I’m working on a print, I don’t want to look at how others have done it, but just give it a go and follow my own inclinations and make my own errors.
With time, I’d like to develop an organic relationship to other printmakers’ works. I don’t like the idea of imitating one particular artist’s style or technique just to tick off a box. Currently it feels like the seeds have been planted and now there’s some patience and good maintenance required to make the seeds grow.