Sketchbook studies
My intention was to try depicting my subject in a variety of media and from different angles. I wanted to see which aspect would capture my attention and interest the most. Apparently this was the visual rhythm of the 5 flowers and their leaves, and the simple but very elegant shapes. Drawing the green leaves was not easy at all. I tried to simplify a bit but did not work with any particular printmaking approach in mind.
I worked with oil pastel, graphite pencil and coloured pencil on white and coloured backgrounds. I also made a watercolour sketch and two charcoal studies. The charcoal studies were inspired by the tulip drawings by Lilian Westcott Hale which I discovered in my research on tulip depictions (described in the blog: ). I focused on tonal values and the figure/ground distinction. I tested the effect of light vs. dark figure before the background in three additional small charcoal sketches.

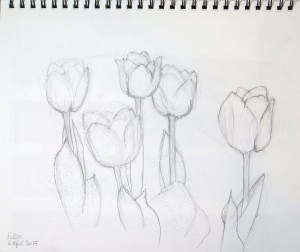


After the research and my initial sketchbook drawings, I felt unsure which technique I might choose for my subject. I liked the painterly approach in Julia Ayres’ monoprints and the two black & white etchings best, compared to the botanical and the graphical approaches.
I thought that monoprints might be the way to go, but also felt inclined towards collagraph. I had been somewhat disappointed by the results of my prints in part 4, at the same time felt I’d barely scratched the surface of the potential of that technique.
My tutor had warned me not to experiment with a technique where I had difficulties, because the aim of the final assignment was to produce successful prints. So I was a bit torn whether I could take the risk of getting nowhere with collagraph.
But I had one leftover plate from part 4, which I had made to explore a technique that’s based on different ink retention depending on the smoothness of the plate surface. I had covered the plate with a layer of fine jersey cloth and the idea was to add layers of pva glue to seal part of the surface so that some areas would retain ink whereas others would reject ink. Tonal gradations are supposed to result from varying numbers of pva layers – more layers increasingle close off the surface and retain less ink. Wiping such a plate means to clean the smooth areas which would then print as light values, whereas the rougher areas would print as darker tones.
The plate was quite large and its size pleased me. I decided to take a jump and try the collagraph approach.
Making the printing plates
The master drawing
I made a soft pencil drawing directly onto the plate. The surface permits erasing and redrawing. I aimed to indicate the darker areas which I would later seal with pva glue. This drawing would become my master drawing. Before proceeding to the pva layer, I transferred the design onto transparent paper for use in subsequent stages.

First collagraph plate
The pva glue was applied in several layers. I left out the darker areas of my composition, applied about 2 or 3 over the mid tones and about 4 or 5 over some light spots and the background area. Between layers, the plate had to dry for about 2 hours. Finally, I applied three layers of shellac on front and back sides, with 4 hours drying time in between. So it took a few days until the plate was ready to use. The shellac added a yellow tone to the plate. The final picture shows the plate after the first intaglio style print with dark, medium and light areas depending on ink retention of the surface.


Mylar masks from the master drawing
I transferred the drawing from the master transfarent onto a blue thin mylar sheet with black sharpie, then carefully cut out the shapes to retain both parts of the drawing as positive and negative masks. I had the idea of using them as masks in layered combination prints.

Second plate: Sand and cloth
Since the drying times of my first plate were long and I had more masonite boards in the same size, I thought it would be a good idea to experiment some more with textures for collagraph plates. I transferred my master drawing onto the plate with carbon paper. I used the negative mask and sprinkled sand onto a layer of PVA glue in the shape of the tulips.
Next I transferred the drawing onto a piece of burlap the exact size of the plate. I cut it out carefully and glued the negative shapes onto the plate for background texture. I applied several layers of PVA glue on top to smooth out the surface a bit. This plate was intended to print as an intaglio and I wanted to have it somewhat smoother to put less strain on the wiping tarlatan which would tear otherwise. The plate was finalized with 3 protective layers of shellac on both sides.
For reference I’m including the plate after the first intaglio print
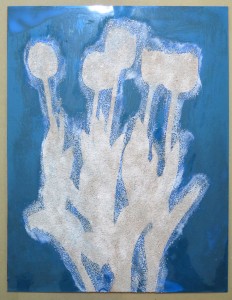


Third plate: Cloth and joint compound
I made a third plate on masonite board, using the positive cloth for the tulips. I temporarily glued the positive mylar mask onto the cloth and applied a thick layer of joint compound with a spatula over the background area. The joint compound cracked during the drying process, and I found this was a very happy accident because the resulting cracks looked so interesting. After the plate was fully dried, I applied 3 layers of PVA glue to close the surface pores and another 3 layers of Shellac to make the plate water resistant.
I intended to use the plate as an intaglio plate as well. The picture shows the plate after one of the initial prints.

Additional collagraphs from cardboard and hot glue
For the fourth plate, I took up a technique I had tried out in part 1: Using corrugated cardboard to texture a monotype printing plate. I cut a piece of cardboard slightly larger than my printing area and glued torn pieces of cardboard on top.
The fifth plate was made with a hot glue gun. I came across stencil making with hot glue while researching scrapbook techniques for crafters and thought this might work as an alternative to backdrawing. The idea was to print a line relief onto an image. I decided to use a cardboard support, rather than making a free stencil, because I wasn’t sure if the glue stencil would be sturdy enough on its own. There were also some elements of the drawing unconnected to outlines, which I wanted to retain. Finally, using cardboard was practical because it spared me having to use a heat resistant working surface.
Technically, I transferred the line drawing onto the cardboard, retraced the lines with a sharpie, then followed them with a hot glue gun. The technique consumes quite a lot of glue and it takes a bit of practice to get at least moderately smooth lines. I reworked some areas to make sure the lines were complete.
Both plates were then sealed with three layers of PVA, then three layers of shellac on both front and back. They bent initially but over the course of applying the layers on both sides and drying time in between, they straightened out flat again.
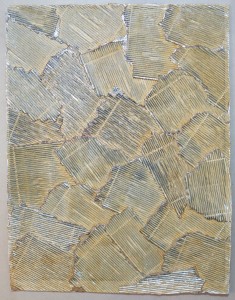

Making all the plates took almost two weeks, despite working on several plates simultaneously, while others were drying. With the five plates, I would have lots of approaches to explore and lots of combination possibilities.
With hindsight, having all these plates created a breadth of approach that was hard to handle. It was also not possible to build on experiences made with one plate to improve subsequent plates. But I think it increased my chances of finding a combination of techniques that would result in successful prints.