I started the printmaking with painted and masked monoprints from a perspex plate and proceeded to the collagraph plates. The prints were mostly monochrome and employed only a single technique because I wanted to have them as reference points for subsequent multicolour and combination prints.
Monochrome monoprints
Painted monoprint and its ghost
Hand burnished on dry smooth drawing paper (170 gsm), with release agent to improve ink transfer


Monoprints with textured background, using the positive mylar mask
Taking up the technique developed in part 1 of the course, I placed the corrugated cardboard onto the inked perspex plate and made a first run through the press to texture the plate. Then I used the plate and the positiv mylar mask to pull some prints. I aligned the mask with the outline drawing placed under the perspex plate, but it was difficult to handle the mask, as it was so thin and flexible and full of ink on one side.
1) Hand burnished print on dry drawing paper
2) Ghost on dry Thai Kozo paper (ca. 70 gsm)


3) Hand burnished on dry Thai Kozo paper. The thin paper captures fine details of the background without the need for a press or dampening the paper
4) Ghost printed with the press on damp Canson Edition paper (250 gsm)


I had the idea of later printing a second layer to colourize the positive shape, but actually didn’t because I found other approaches more interesting.
Using the masks with the press didn’t work so well because only modest pressure can be applied, otherwise the mask is squeezed and slides over the plate, making clean registration very difficult. The effects from the sliding mask may be nice as accidents, but I didn’t want to pursue that further.
Ghost prints from the textured plate and the mask
The ghost prints were made after the masked prints, having pulled off the mask from the perspex plate
1) The perspex plate itself
2) Ghost from that plate, on white drawing paper hand burnished
3) Second ghost from the plate, with release agent and the press on damp Canson Edition paper
4) Print directly off the mask, with release agent on dry drawing paper, hand burnished


Styrofoam relief prints
Collagraph plate 1 did not have much haptic texture because it was created flat with just layers of PVA glue, but plates 2 and 3 had quite a bumpy surface. I made impressions from the collagraph plates onto thin styrofoam sheets by running them through the press, which created a relief surface from which I subsequently printed by hand.
The third styrofoam sheet was incised by drawing through the transparent master drawing and working out the lines with the back of a brush directly into the styrofoam sheet.
1) Onto damp Canson Edition paper
2) and 3) Onto dry drawing paper
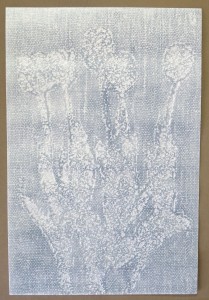


Cardboard collagraph prints
Further experiments with the cardboard collagraph
1) Perspex plate textured with the cardboard collagraph in a run through the press, then inked with release agent. Hand burnished on dry drawing paper
2) Re-inked and re-textured plate, then tulips painted into the ink over the transparent drawing. Release agent applied. Hand burnished on dry drawing paper.


I wasn’t overly satisfied with the results from the cardboard plate textures. Technically, the plate was difficult to handle and slid around when I ran it through the press on top of the perspex plate.
Painting into the textured plate didn’t look very interesting either as a monochrome print, although I liked how the brush marks transferred onto the paper. I guess the problem was the recurring issue with too much similarity between figure and ground: Same colour and similar texture characteristics and colour distribution within the texture.
Hot glue relief print
A simple tryout print in dark red from the hot glue relief plate, printed by hand onto dry all purpose paper.
Inking and printing the plate was cumbersome. Firstly, my rollers were only 1/3 as wide as the plate so I constantly smeared ink into the background where I did not want it. Secondly, I did not know how to register the plate because of the surplus area around the border line. I eyeballed but anticipated difficulties when printing in layers.

Prints from the collagraph plates
Plate 1: The cloth and PVA collagraph
I made a first print from the plate as a relief print to see whether any interesting relief texture would result, but it didn’t. So I proceeded to properly inking and wiping the plate, then pulled prints with the press onto damp paper.
I was quite happy with the results and found that the image came out nicely. There was an interestingly textured background and good contrast between figure and ground. The tonal values were not as controlled as I had imagined, but there was enough tonal contrast to make the flowers stand out clearly.
1) Plate inked with a brayer as a relief, hand burnished on dry Strathmore Printmaking paper (medium weight)
2) Plate inked deeply with a brush and wiped intaglio style: Ink stays in the rougher areas of the plate and was wiped away from the smooth parts. Then the plate was printed on damp Canson Edition paper with the press.
3) and 4) Same technique, same paper. Print and ghost from newly inked plate. For the ghost I used release agent to improve ink transfer.


Initial collagraphs from plates 2 and 3
Plate 2: Sand and cloth collagraph
Plate inked intaglio style, wiping away excess ink with tarlatan. Then printed on damp Canson Edition paper with the press.
The textures are deeply embossed and look interesting from close, but the overall impression confirmed what I had anticipated after the styrofoam relief print off this plate: The texture of tulips vs background did not have enough variation to make the tulips stand out clearly. Colour or a combination print would be required to obtain a clearer visual effect.

Plate 3: cloth and joint compound background
Multicolour inking, intaglio wipe, printed with the press on damp Canson Edition paper
I inked plate 3 in two and three colours respectively to improve the difference between figure and ground. I chose “cold” vs “warm” colour combinations for the two prints. I particularly liked the effect of the cracked joint compound layer in the background, which created both an embossement and an interestig colour texture.

